Welcome back, my intrepid, vicarious kit builders! Come join me for another episode of our journey toward Single-Ended Triode bliss with the Audio Note Kits Kit 1 amp.
A bit of a tangent:
My friend Mickey and I were discussing this build process the other day. Mickey loves tinkering with motorcycles but, as a kid, he built Heathkit electronics. His significant other was listening in on this conversation as I described the therapeutic aspects of building something with one’s own hands. As someone with a very administrative, managerial career but a lot of artistic inclinations, she commented, “Yes, there’s a lot of kinesthetic enjoyment to building something.” She nailed it – there’s a satisfaction to handling the raw parts of this kit, experiencing their weight, texture and color that is so hard to convey in photos, alone, but I’ll try…
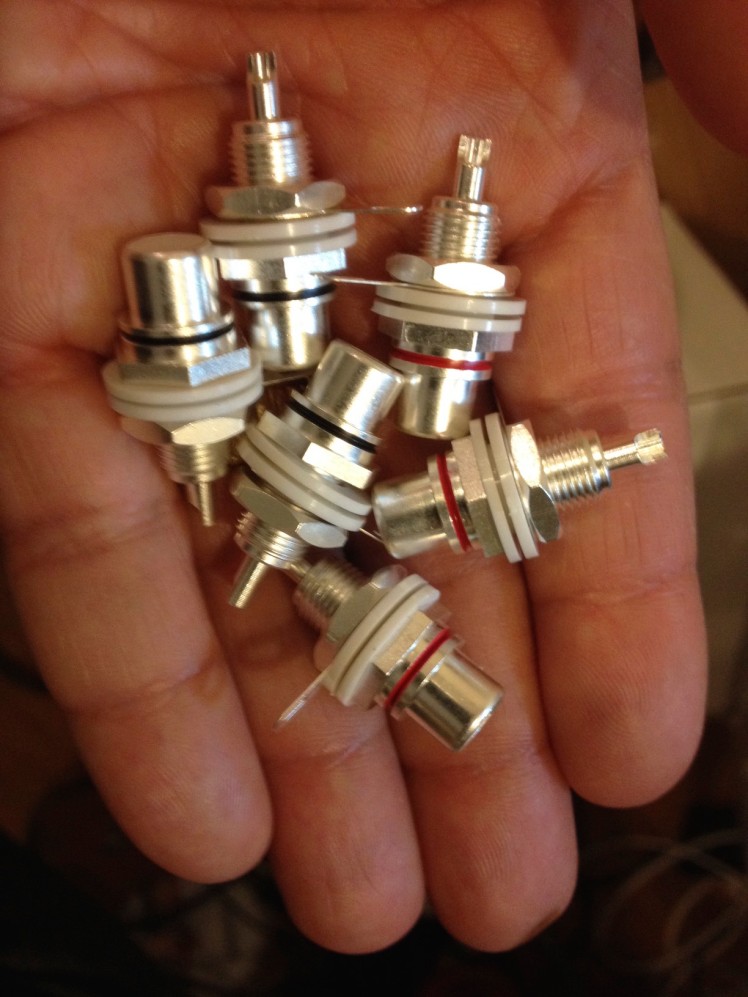
For example, here we have a palm full of Audio Note silver RCA jacks, all heavy, sparkly and beautiful. As I’ve said before, THIS is “audio jewelry!”
(And if you look very carefully at the bottom of my middle finger, you can see where I nailed my fingertip with my soldering iron while trying to desolder an errant wire on the Power Supply board… don’t ask…)
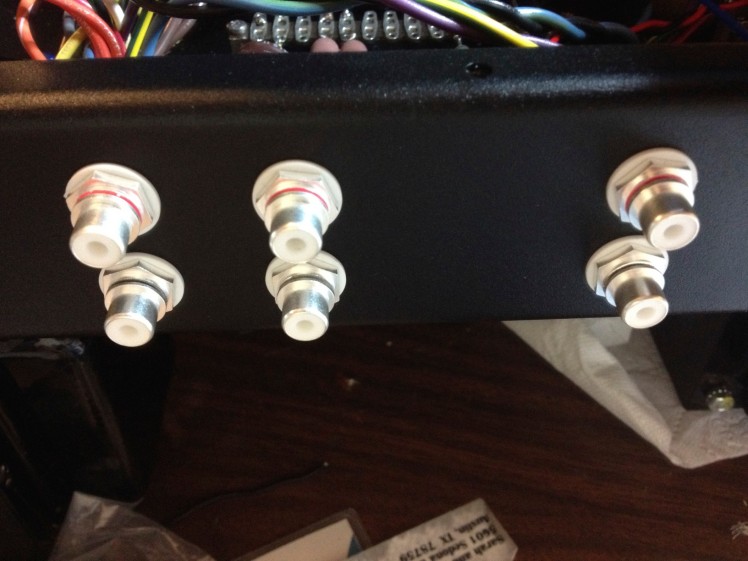
Here are the installed RCA inputs from the outside of the chassis, although they’re still upside down while the chassis rests on its transformers so I can work on the innards of the amp.
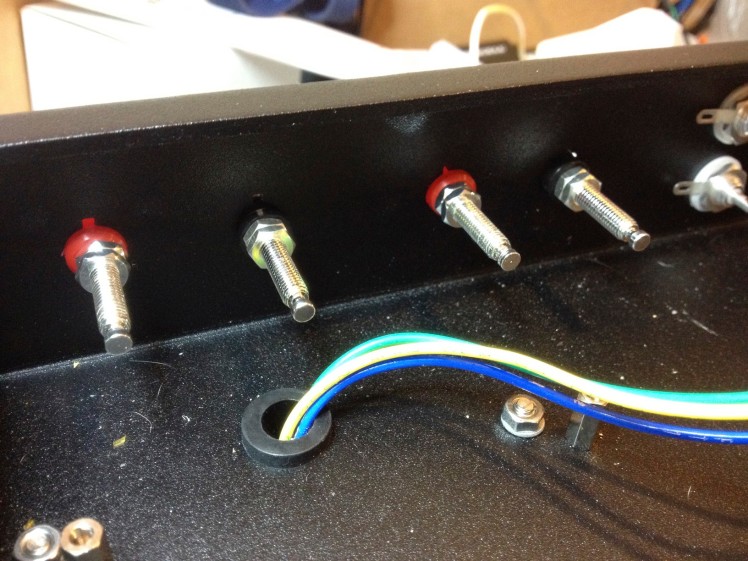
This next photo shows you how the Audio Note silver speaker binding posts (also heavy, sparkly and beautiful) screw into the chassis.
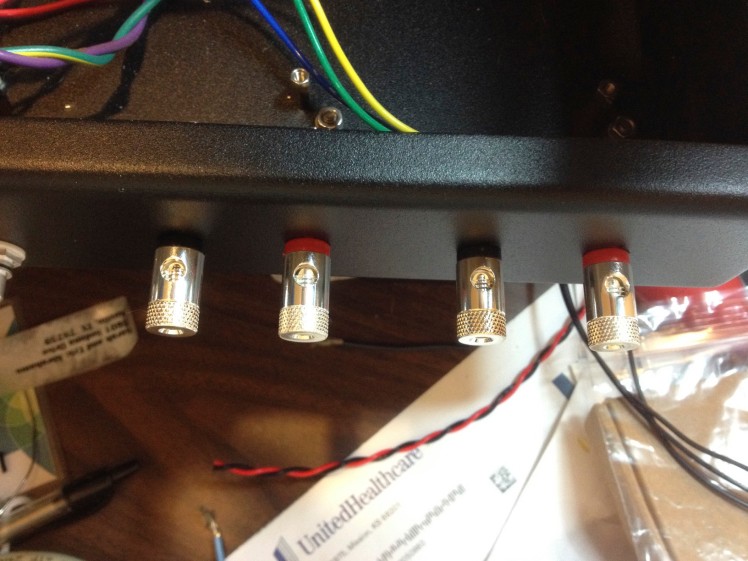
Here’s a view of the speaker binding posts from the outside of the chassis…
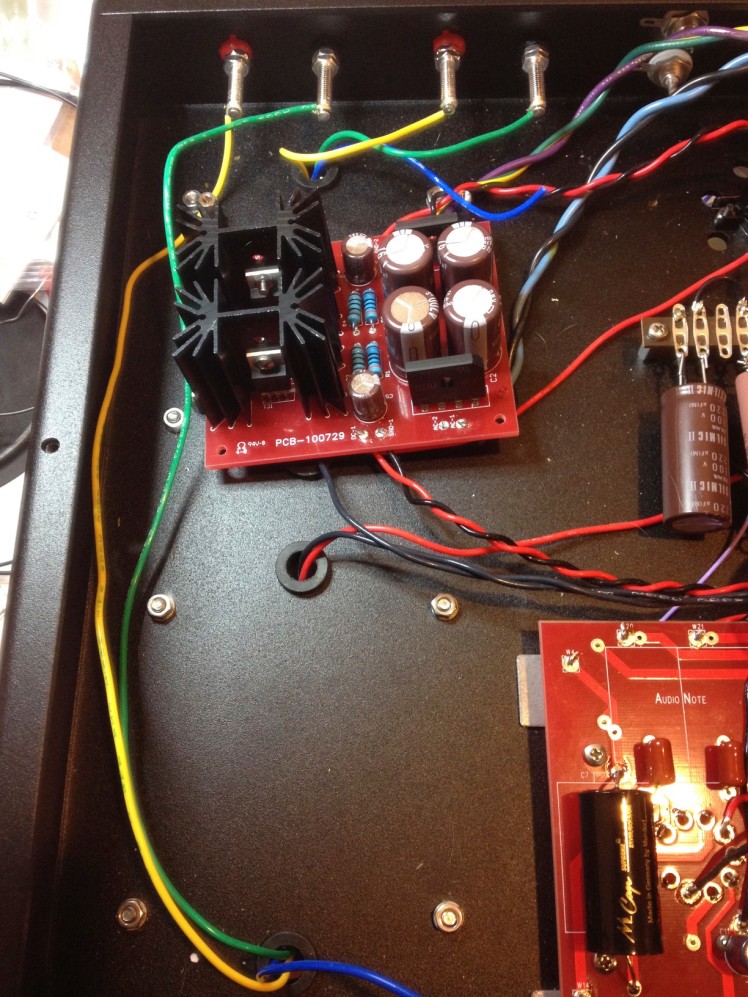
Finally (for this post, anyway) here’s how the speaker posts are connected to the Output Transformers’ secondary wires. You’ll notice that there are three wires coming through each of the grommets: yellow, blue and green. The green wires are the ground and go to the black posts. The yellow wires are used for creating 8 ohm speaker taps and go to the red posts. Here, the blue wires are unconnected because my Reference 3A De Capo’s are an 8 ohm load, but if I needed a set of 4 ohm taps, I’d have used the blue wire in place of the yellow. As it stands, I think I’ll leave the blue wires sealed off with shrink tubing (but untrimmed) in case one day I have a speaker that’s a 4 ohm load.
Well, there you have it: another post. I’m not sure what I’ll be tackling in the next post. Probably the input selector switch, which is a fairly involved bit of work.
Stay tuned…
Hi Rebbi,
It looks like you are doing a very neat job, and that is a compliment considering that Digital Pete built mine, and he is fanatically neat. Yours looks excellent. I am excited for you to see that you are in the home stretch. One thing that I really like about the chassis is the solid feel. Apparently, they used to make it out of 1mm. steel, but now it’s 2mm. aluminum, and there is no tinny feel to is. It is a handsome amp for sure.
Hi, Roxy!
Thanks for the kind compliments. I’m certainly trying to be neat! One thing about building a kit like this is that your efforts get stronger as you move along. So, for example, once you’ve shaped, snipped, tinned and surface mounted a few of the resistors that mount in that way, you get a rhythm going and feel more confident in doing it.
Someone asked me if I’d been logging the number of hours I’ve put into this thing and the fact is that I haven’t. But I’m sure someone with more time and a little less perfectionism could have built two of these already! 😉